I got the other nock shaped and have been shooting this bow quite a bit. it has settled in at a hair over 45lbs at my 28 1/2" draw length. It shoots the same arrows as the ones my best 50ish lb bows like. I don't need a chronograph to tell me what that really means. I've always been a strong proponent of shooting the heaviest gear that you can handle. heavy bows and, more importantly, heavy arrows. I have lost so much strength in the last few years that I can barely believe it. at 66" in length and plenty of zip for 45lbs, I think I'm going to go with it. swallow my pride and accept the reality that I just cannot do what I was able to do easily 10 years ago. I shoot this bow really well, and it does not hurt me. my form is better with this girly weight bow, and I feel better about shooting than I have in a long time. I know this is plenty of power to kill a deer, but now there is even less room for error. no more smashing bones to get the job done. it's either in the center of the ribs, or, well, you know how it goes if it isn't. so, I have dozens and dozens of arrows for bows in the 55-65lb range. about half dozen spined for bows under 55lbs. this 45lb bow likes 60lb spine arrows with 160 gr points. I made these arrows for a short static recurve that I made about 10 years ago for late season hunting. it is 51lbs, and I killed these two deer with it in January; the only month I ever hunted with it. 1/8/09 and 1/28/10
View attachment 101407View attachment 101408
Now I'm on a mission to tune up some arrows better than I ever have before. I don't need paper to tune wood arrows, but I'll bare shaft until I get arrows that go where I want without rudders. which brings me to the actual point of this post.
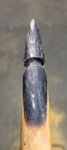
over the weekend I found some 11/32" Douglas Fir shafts that I've culled out of many dozens of raw shafts because they were light for the 70-75 lb spine class they were sold as. I start with 70-75's when making matched sets of arrows for the heavier bows I've been using for the last 20 years. these are all 65-67lb spine. just about perfect for what I'm doing with them. it is my intention to wind up with perfectly spined arrows that weigh in the neighborhood of 11-12 grains per pound of bow weight it's time to hunt. so, 500-550 grains total. most people consider 10 grains per pound to be "heavy" arrows. the arrows in my quiver in the above photo are parallel Fir shafts with 160grain Magnus two blade heads and weigh between 560 and 585 grains. I made 6 of those for hunting. two got destroyed killing deer, I have the other four still, two of which I put field points on for the beginning of this trial. I did a long 12" nock taper (to 5/16") on them to help reduce the spine and weight, improve recovery from paradox. I'm going to start with their full 32" length and shorten while I bare shaft tune. for many moons I've been cutting my arrows to 29 1/2" b.o.p. don't know where I'll end up with these and it doesn't matter. after tapering and hand sanding to make them all exactly 60lb spine, and three dips in gasket lacquer, I'm onto fletching a couple.
I use my Bitzenburger when I'm only doing a few arrows or when I'm replacing a damaged fletching.
View attachment 101410
when I'm doing a dozen or more I use my Jo-Jan multifletcher, which works just as well as high end Bitzy if you take the time to adjust it correctly for your arrows and desired helical.
View attachment 101411