not driftwood, actually. the tree is alive, but the bank washed out and one trunk was falling over, so I cut out the bow wood and firewood. same thing happened to a different trunk of the same tree back in 2009. it was leaning about 45* and was going to fall over. I liberated the bow wood before it became driftwood. in a couple of years I'll have some nice 4" saplings for limb bows from the suckers that grew out of that first stump. some nice straight ones that I've pruned clean for the last few years.
You are using an out of date browser. It may not display this or other websites correctly.
You should upgrade or use an alternative browser.
You should upgrade or use an alternative browser.
Welcome to TheOhioOutdoors
Wanting to join the rest of our members? Login or sign up today!
Login / Join
Been busy in the shop
- Thread starter Jamie
- Start date
I bought some Forgewood arrow shafts from Alaska Frontier Archery back in the 90's. Compressed Mt. Hemlock, and they did not float. they take a 34" long tapered board that is 1 1/8" on one end and 5/8" on the other and compress the whole thing to 3/8" then dowel out the shafts. extremely dense, especially the point end.
Gordo
Senior Member
Archertl
Senior Member
Gordo
Senior Member
I've forgotten how much work bowyerin' can be. just like I forgot that I had a decent 12" osage log hiding behind my wood pile since last June. Normally, when I cut osage, it is a non-stop affair until I have all of the usable wood reduced to bow blanks. it's a lot of work, and when I cut this wood last summer I spent a week of evenings boning out the above three pairs of billets, steaming and correcting them. (more on this later)
So, I decided while the weather is decent and I have the time and motivation, I need to bust up that 7' log. here we go...
step one, get a 7' or so osage log that is relatively straight and clean. (it's harder than you think)

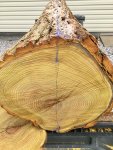
now decide how to go about splitting to maximize usable wood. for this piece, 6 staves are possible, but 4 or 5 is more likely. there are a few knots and small limbs to negotiate, and it is about 2" less in diameter at the top. bottom of log was the base of the tree. I mark it up in pencil, snap chalk line and saw 1" kerfs with a circular saw to help guide the splits to go where I want. look closely to see that the kerf on bottom of log is already cut.
and now the fun part. split into two, then each half into thirds.
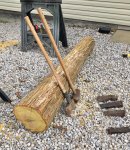
it's important to start the split as accurately as possible. I like to start on the end with my Estwing hatchet. sharp thin blade usually goes in with proper persuasion from 4lb sledge hammer. once started, it's just driving in wedges a foot of so apart until you get her opened up all the way. it's a fair amount of pounding with a 10lb sledge. this one particularly uncooperative.
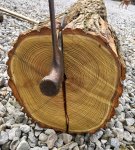

the split ran astray a little bit. likely will not hurt anything as these splits are all going to be generous in size. wiggle room, per se.

so far, so good.

now I snap two lines on each half, saw kerfs, and split these halves into three chunky splits. one split went off course for no reason that I could see, but it may be salvageable. osage can be quite contrary. still, I'm going to have at least 5 nice full length bow staves, maybe 6. I could sell these easily for $100 a piece, a couple of them $150 or more. good bow wood that you procure with your own two hands is precious and has value far beyond it's monetary worth. a good haul for a tree that was going to fall into the creek in my back yard. :smile:
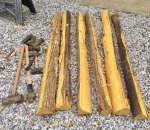
I'm officially tired now.
So, I decided while the weather is decent and I have the time and motivation, I need to bust up that 7' log. here we go...
step one, get a 7' or so osage log that is relatively straight and clean. (it's harder than you think)

now decide how to go about splitting to maximize usable wood. for this piece, 6 staves are possible, but 4 or 5 is more likely. there are a few knots and small limbs to negotiate, and it is about 2" less in diameter at the top. bottom of log was the base of the tree. I mark it up in pencil, snap chalk line and saw 1" kerfs with a circular saw to help guide the splits to go where I want. look closely to see that the kerf on bottom of log is already cut.

and now the fun part. split into two, then each half into thirds.

it's important to start the split as accurately as possible. I like to start on the end with my Estwing hatchet. sharp thin blade usually goes in with proper persuasion from 4lb sledge hammer. once started, it's just driving in wedges a foot of so apart until you get her opened up all the way. it's a fair amount of pounding with a 10lb sledge. this one particularly uncooperative.


the split ran astray a little bit. likely will not hurt anything as these splits are all going to be generous in size. wiggle room, per se.

so far, so good.

now I snap two lines on each half, saw kerfs, and split these halves into three chunky splits. one split went off course for no reason that I could see, but it may be salvageable. osage can be quite contrary. still, I'm going to have at least 5 nice full length bow staves, maybe 6. I could sell these easily for $100 a piece, a couple of them $150 or more. good bow wood that you procure with your own two hands is precious and has value far beyond it's monetary worth. a good haul for a tree that was going to fall into the creek in my back yard. :smile:

I'm officially tired now.
This is very interesting and fun to follow along. I wished I lived close so I could help and learn this art. Awesome stuff Jamie!
Gordo
Senior Member
Ric, this is not an activity that requires training. like so much else today, the information is out there and easy to find, but it was not like that 25 years ago. wood bowyery was practically dead until the middle 90's. while having some personal instruction is helpful, you or anyone just needs to roll up their sleeves and get busy doing and learning. reading is a good start, and there are plenty of books, both old and new, that are chock full of good information. video's, too. you don't live that far away, anyway. if you are seriously interested in making a bow, come and see me. you can learn a lot in a couple of weekends.
with that log separated into 6 decent splits, there is still quite a lot of work to do with drawknife and bandsaw, and the clock is ticking now as these splits are getting drier by the minute. the idea is to get these reduced to blanks and steam corrected while the wood is still pretty green and laden with moisture, which is why I should have done this last summer. this log has dried out a small amount, but the wood is still "green" enough to steam for correction if I can get this done in the next couple of weeks. I have four days to work before I have to stop and paint something. start today
with that log separated into 6 decent splits, there is still quite a lot of work to do with drawknife and bandsaw, and the clock is ticking now as these splits are getting drier by the minute. the idea is to get these reduced to blanks and steam corrected while the wood is still pretty green and laden with moisture, which is why I should have done this last summer. this log has dried out a small amount, but the wood is still "green" enough to steam for correction if I can get this done in the next couple of weeks. I have four days to work before I have to stop and paint something. start today
Ric, this is not an activity that requires training. like so much else today, the information is out there and easy to find, but it was not like that 25 years ago. wood bowyery was practically dead until the middle 90's. while having some personal instruction is helpful, you or anyone just needs to roll up their sleeves and get busy doing and learning. reading is a good start, and there are plenty of books, both old and new, that are chock full of good information. video's, too. you don't live that far away, anyway. if you are seriously interested in making a bow, come and see me. you can learn a lot in a couple of weekends.
with that log separated into 6 decent splits, there is still quite a lot of work to do with drawknife and bandsaw, and the clock is ticking now as these splits are getting drier by the minute. the idea is to get these reduced to blanks and steam corrected while the wood is still pretty green and laden with moisture, which is why I should have done this last summer. this log has dried out a small amount, but the wood is still "green" enough to steam for correction if I can get this done in the next couple of weeks. I have four days to work before I have to stop and paint something. start today
Hmmmm:smiley_chinrub:
Gonna try and navigate a few weekends the next month or so. Maybe see if Brian, Windbag would want to come along.
got a pretty good start on these staves today. began by swapping out my vise for the Stave Press. the vise stand and luthiers vise are the best money I ever spent on this activity.


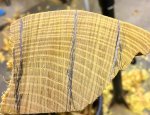
touched up the draw knife and started whackin'. this is what is referred to as "chasing a growth ring". one growth ring is followed religiously the entire length of the stave. there are two components to one growth ring, the spongy "early wood" which is the light colored thinner lines, and the hard "late wood". early wood is grown very quickly early in the growing season, late wood is what is added for the remainder of growing season. the ratio of early wood to late wood is important, and the thickness of the annual rings is important, too. these staves are very mediocre on both counts. we leave behind a thin layer of the early wood above what will eventually be the back of the bow.

in the pic on the right you can see the step down of each growth ring. the small areas that I circled in pencil are places where I accidentally removed all of the early wood, exposing what will be the actual back of the bow. the idea is we want the layer of late wood to be pristine in the finished bow. the early wood we leave behind now for protection will be carefully removed later with cabinet scrapers. I actually needed to use my gooseneck scraper to get into some hollows on the back of this stave. was a pain in the ass. I really gotta sharpen that thing.

touched up the draw knife and started whackin'. this is what is referred to as "chasing a growth ring". one growth ring is followed religiously the entire length of the stave. there are two components to one growth ring, the spongy "early wood" which is the light colored thinner lines, and the hard "late wood". early wood is grown very quickly early in the growing season, late wood is what is added for the remainder of growing season. the ratio of early wood to late wood is important, and the thickness of the annual rings is important, too. these staves are very mediocre on both counts. we leave behind a thin layer of the early wood above what will eventually be the back of the bow.

in the pic on the right you can see the step down of each growth ring. the small areas that I circled in pencil are places where I accidentally removed all of the early wood, exposing what will be the actual back of the bow. the idea is we want the layer of late wood to be pristine in the finished bow. the early wood we leave behind now for protection will be carefully removed later with cabinet scrapers. I actually needed to use my gooseneck scraper to get into some hollows on the back of this stave. was a pain in the ass. I really gotta sharpen that thing.
back now established. 
time to establish a center line along the crown of the stave, then work from that center line to lay out the 2" width of the bow blank. cut it out, squaring up the sides keeping them perpendicular to the back. for staves that are straight, I mark the crown on both ends and snap a chalk line. after the center line is established, I run a piece of 1" blue tape down both sides of the line. it's easier than trying to snap two more chalk lines, and makes it easy to see while cutting it out with band saw. for "snakey" staves that have grain meandering from side to side, or for large knots or other irregularities, I mark the crown by hand, following the grain. this stave is pretty straight from side to side, but has some propeller twist and some deflex and reflex in places we don't want it. it's hard to see that in the pics. it's a hot mess, but those things can be corrected with heat.

once the width is cut out, I pencil in the thickness profile and handle area, using the back of the bow as a guide so as to follow all of the natural contours and undulations of the stave. we want these lines to be perfectly parallel to the back, except for the handle and where it flows into the limbs.

back to the band saw to roughly cut out the thickness, clean it up with draw knife, then two coats of shellac on the back and ends. we only want moisture to leave through the sides and belly, shellac is an excellent moisture barrier, and durable enough to take an hour in the steam chamber.

time to establish a center line along the crown of the stave, then work from that center line to lay out the 2" width of the bow blank. cut it out, squaring up the sides keeping them perpendicular to the back. for staves that are straight, I mark the crown on both ends and snap a chalk line. after the center line is established, I run a piece of 1" blue tape down both sides of the line. it's easier than trying to snap two more chalk lines, and makes it easy to see while cutting it out with band saw. for "snakey" staves that have grain meandering from side to side, or for large knots or other irregularities, I mark the crown by hand, following the grain. this stave is pretty straight from side to side, but has some propeller twist and some deflex and reflex in places we don't want it. it's hard to see that in the pics. it's a hot mess, but those things can be corrected with heat.

once the width is cut out, I pencil in the thickness profile and handle area, using the back of the bow as a guide so as to follow all of the natural contours and undulations of the stave. we want these lines to be perfectly parallel to the back, except for the handle and where it flows into the limbs.
back to the band saw to roughly cut out the thickness, clean it up with draw knife, then two coats of shellac on the back and ends. we only want moisture to leave through the sides and belly, shellac is an excellent moisture barrier, and durable enough to take an hour in the steam chamber.
switchhitter
Junior Member
You aren’t kidding when you say been busy in the shop.
Really good build along, tons of great information.
Really good build along, tons of great information.
